
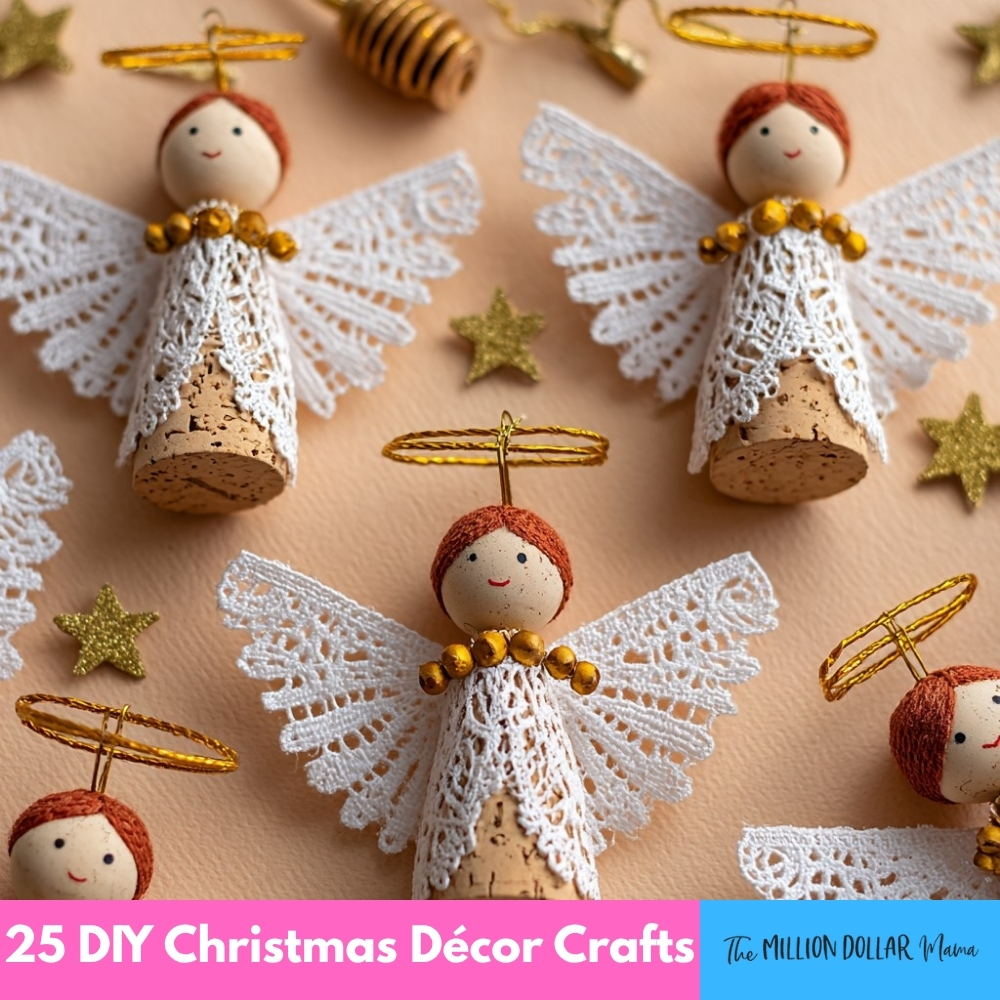
Last year, while pulling out my Christmas decorations, I had that familiar thought so many of us have: Why does my home still need one or two pieces that feel warmer, prettier, and more personal? That’s exactly why I love DIY Christmas Décor Crafts. They have a way of making a room feel more lived-in, more festive, and more connected to the people decorating it.
What makes handmade Christmas décor so appealing is that it doesn’t have to fit one single style. Some homes look beautiful with rustic wood, pinecones, and greenery. Others come alive with cheerful reds, painted details, tiny characters, glowing lights, or soft vintage touches. A handmade decoration can be simple, but it still has the power to become one of the first pieces everyone notices.
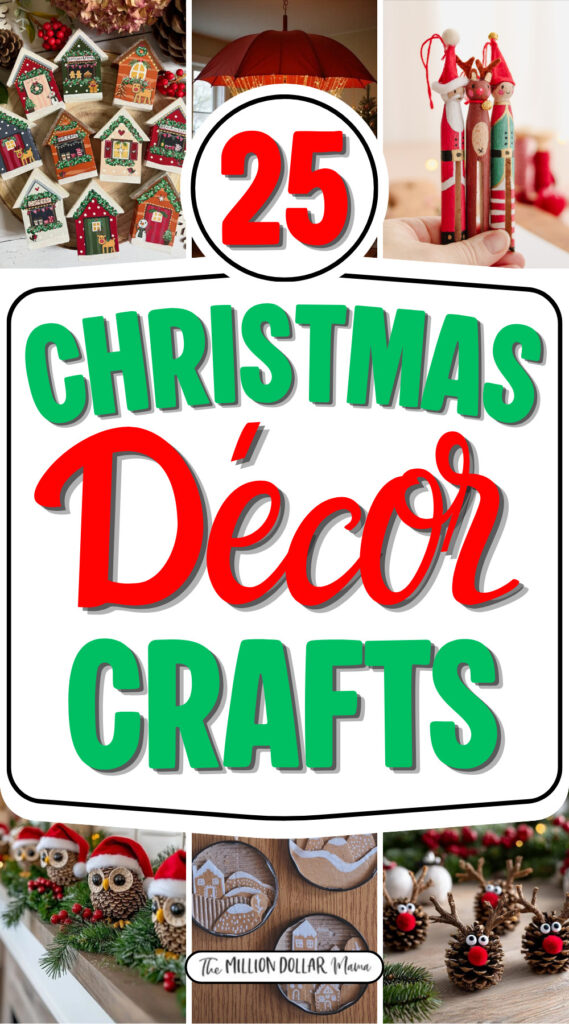
In this article, I’m sharing 25 Christmas craft designs that work beautifully as inspiration pieces while still showing you how each one comes together.
If you’re looking for another hands-on holiday project, you may also love this DIY Christmas Countdown Calendar.
25 DIY Christmas Décor Crafts to Inspire Your Holiday Decorating
1. Pinecone Elf Hanging Ornaments
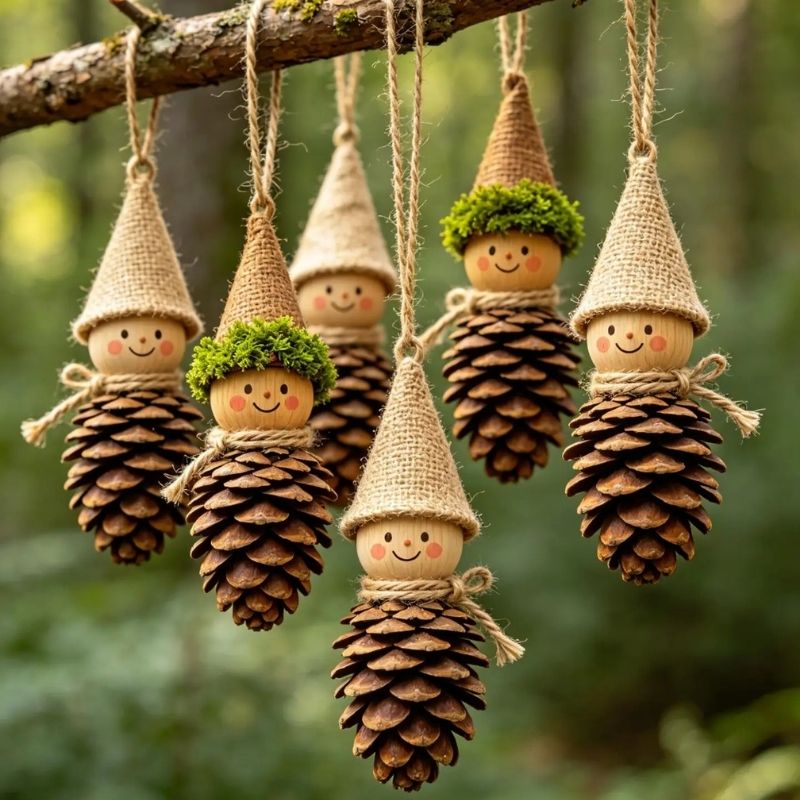
These sweet ornaments turn pinecones into smiling little elves with round wooden faces, burlap cone hats, twine bows, and soft green moss collars. The natural textures make them feel cozy, woodsy, and charming without needing glitter or bright extras.
For another handmade decorating idea, explore these Christmas Door Wreath Ideas.
Materials:
- Large pinecones
- Wooden beads or small wooden balls
- Burlap or linen fabric
- TwineMoss
- Paint or fine-tip markers
- Hot glue
How It’s Made:
- Attach a wooden bead to the top of each pinecone to form the head.
- Draw simple faces with eyes, rosy cheeks, and a smile.
- Shape cone hats from burlap or linen and glue them on top.
- Add a moss collar and tie twine around the neck area.
- Glue a loop of twine at the top for hanging.
Styling Idea:
These look beautiful on a rustic Christmas tree or hanging from a natural branch display.
2. Santa Hat Pinecone Owls
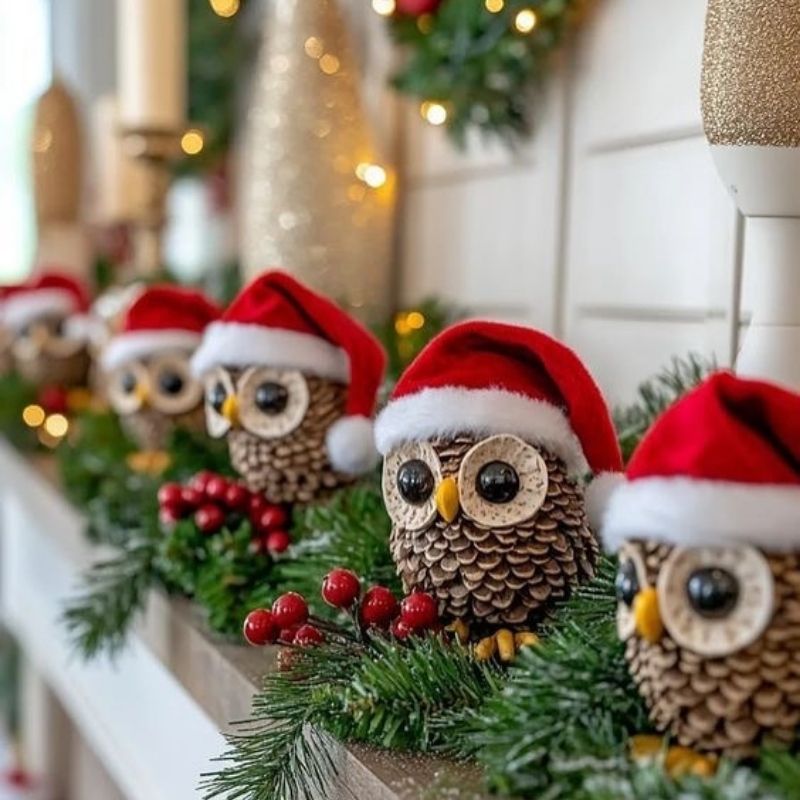
These adorable owls combine layered pinecone texture with oversized eyes, tiny yellow beaks, and bright red Santa hats. Set against an evergreen garland, they feel playful but still cozy enough for a classic Christmas mantel.
You may also like this Adorable Snowman Ornament for Kids to Make This Christmas.
Materials:
- Pinecones
- Large googly eyes or painted wooden eyes
- Felt or fabric for Santa hats
- Small yellow foam, felt, or clay beaks
- White trim or pom-poms
- Hot glue
How It’s Made:
- Use a pinecone as the owl’s body and glue on the eyes near the top.
- Attach a small pointed beak between the eyes.
- Make mini Santa hats from red felt and add white trim and a pom-pom.
- Glue the hats slightly to one side for a softer look.
- Nestle the finished owls into a garland or place them upright on a shelf.
Styling Idea:
They’re perfect lined up on a mantel, windowsill, or holiday centerpiece.
3. Painted Wooden Santa, Reindeer, and Elf Figures
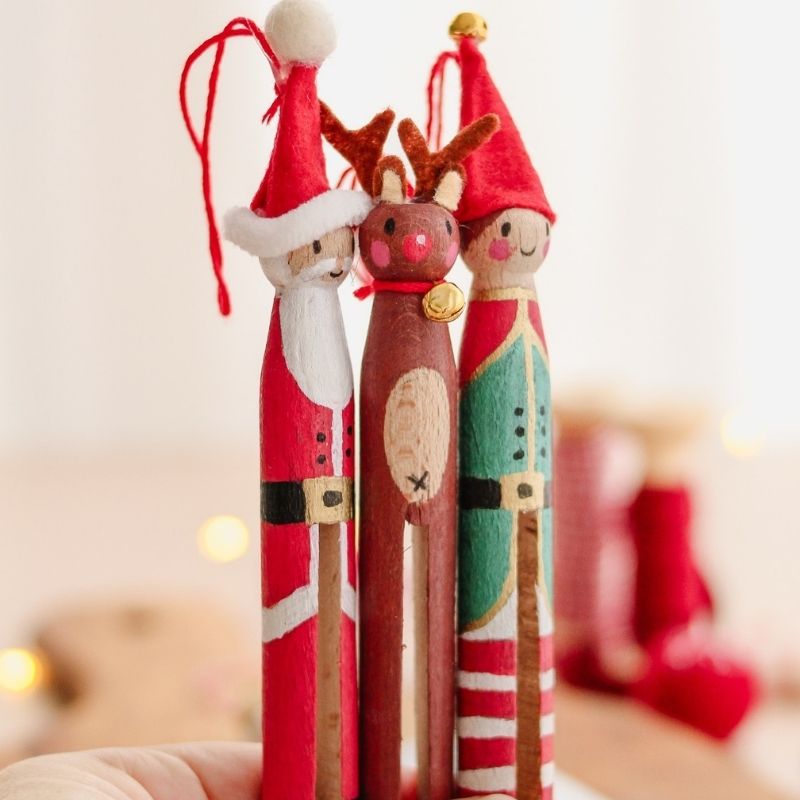
These slim painted figures have a simple folk-art feel, with Santa in red, a brown reindeer in the center, and a cheerful elf in bright Christmas colors. The look is clean, cute, and very giftable.
Materials:
- Wooden clothespins or peg dolls
- Acrylic paint
- Fine paintbrushes
- Red string or cord for hanging
- Small pom-poms or bells
- Sealer optional
How It’s Made:
- Paint each peg or clothespin base to resemble Santa, a reindeer, and an elf.
- Add facial features, clothing details, belts, and trim with a small brush.
- Create tiny hats or antlers depending on the character.
- Attach string loops to the top so they can hang as ornaments.
- Seal once dry if you want the paint to last longer.
Styling Idea:
Hang them on the tree or tie them onto wrapped presents as decorative toppers.
4. Cardboard Winter Village Lid Ornaments
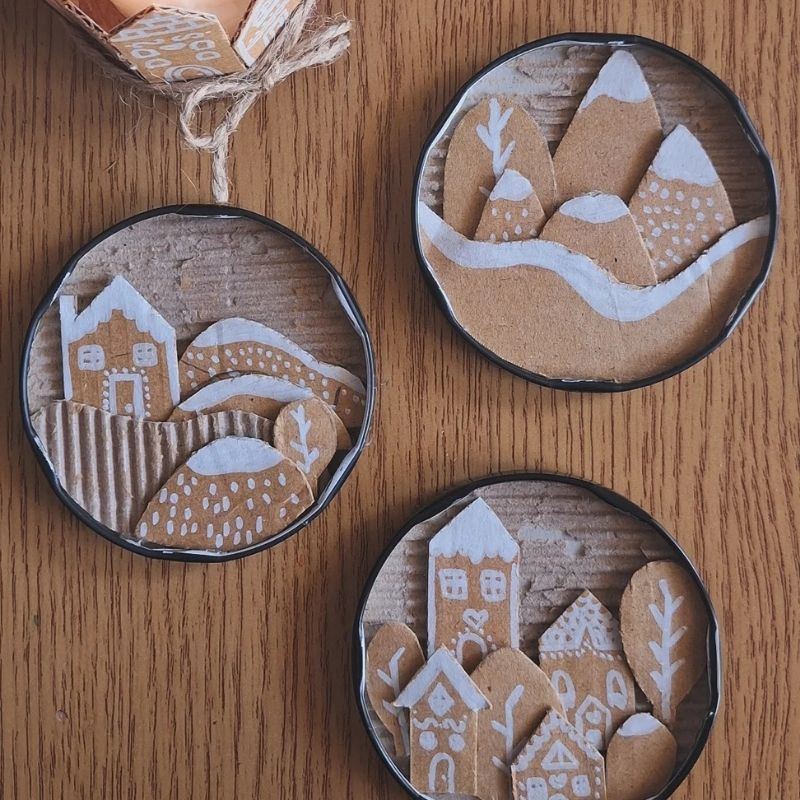
These circular ornaments look like miniature snow scenes tucked inside jar lids. With layered cardboard hills, tiny houses, and white painted snow accents, they feel soft, handmade, and wonderfully creative.
Materials:
- Jar lids, metal rings, or cardboard circles
- Corrugated cardboard
- White paint
- Brown kraft paper or natural cardboard
- Twine
- Glue
How It’s Made:
- Use the lid or circle as the frame for each miniature scene.
- Cut layered hills, houses, and tree shapes from cardboard.
- Glue the layers inside the frame to create depth.
- Add white paint for snowy rooftops, paths, and details.
- Attach twine to hang each finished ornament.
Styling Idea:
These are lovely on a tree, on a gift, or grouped together on a small wall display.
5. Christmas Umbrella Light Chandelier
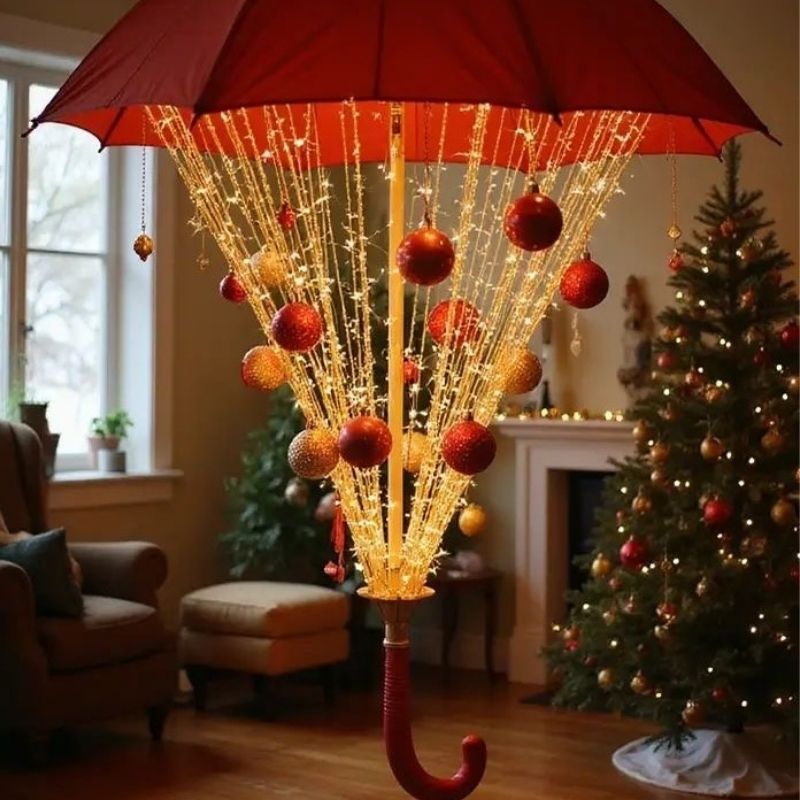
This is one of the boldest ideas in the group: an upside-down red umbrella transformed into a glowing holiday feature with warm string lights and hanging ornaments. It feels whimsical, dramatic, and perfect for someone who loves conversation-starting décor.
Materials:
- Red umbrella
- Warm fairy lights
- Lightweight Christmas ornaments
- Ribbon or clear thread
- Stand or secure hanging support
- Optional greenery accents
How It’s Made:
- Open the umbrella and position it upside down in a secure stand or corner.
- Wrap fairy lights from the handle upward and through the umbrella frame.
- Suspend ornaments at different heights from the inside structure.
- Adjust the spacing so that the lights and baubles are evenly spaced.
- Test the overall glow and tweak until the arrangement feels balanced.
Styling Idea:
Use it in an entryway, living room corner, or holiday party setup.
6. Painted Mini Christmas Houses
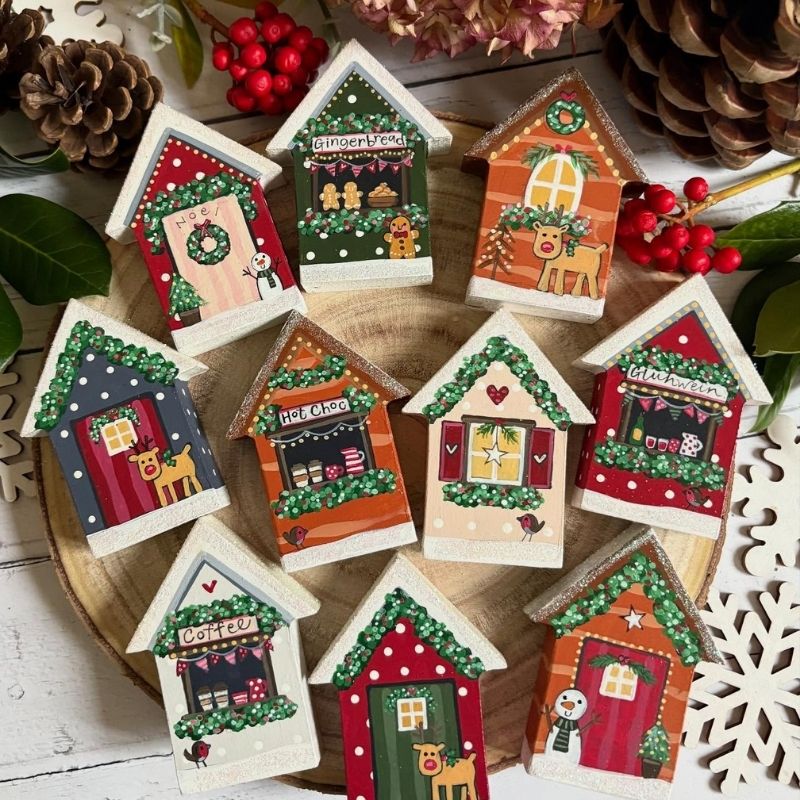
These tiny painted houses feel like a cheerful Christmas market in miniature. Each one has its own colors, windows, wreaths, signs, and snowy trim, which makes the full collection feel lively and detailed.
Materials:
- Small wooden house blanks or blocks
- Acrylic paint
- Fine-detail brushes
- Paint pens optional
- Glitter or faux snow optional
- Sealer optional
How It’s Made:
- Paint each wooden house in a different festive color palette.
- Add doors, windows, trim, signs, and little holiday motifs.
- Dot on greenery, snow, tiny animals, or market-style accents.
- Let everything dry fully before adding glitter or sealant.
- Display them together as a coordinated little village.
Styling Idea:
Arrange them on a tray, shelf, or windowsill for a cheerful tabletop display.
Looking for a quieter Christmas activity for kids? Try these free Disney Christmas coloring pages.
7. Pinecone Reindeer
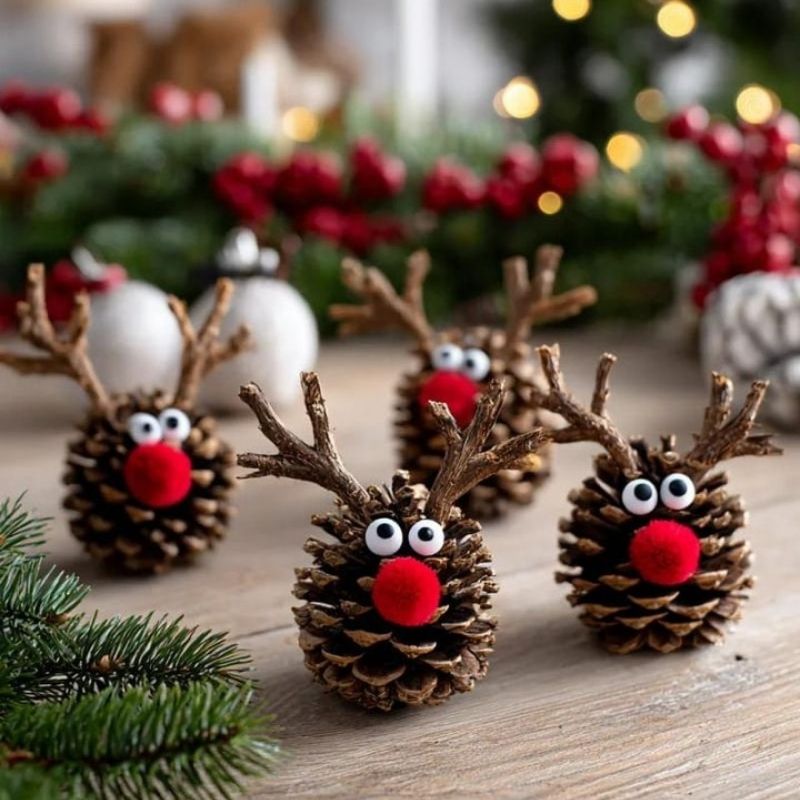
These pinecone reindeer are delightfully simple, with twig antlers, googly eyes, and bright red pom-pom noses. They bring instant Rudolph energy and look especially cute scattered across a table.
Materials:
- Pinecones
- Small twigs
- Googly eyes
- Red pom-poms
- Hot glue
- Optional small wood slices for bases
How It’s Made:
- Glue two googly eyes near the front of each pinecone.
- Attach a red pom-pom nose below the eyes.
- Glue twig antlers into the upper back scales of the pinecone.
- Let the glue set fully so the antlers stay upright.
- Add a base if you want them to stand more steadily.
Styling Idea:
Use them as table accents, place card holders, or playful shelf décor.
8. Rustic Branch Christmas Tree Wall Art
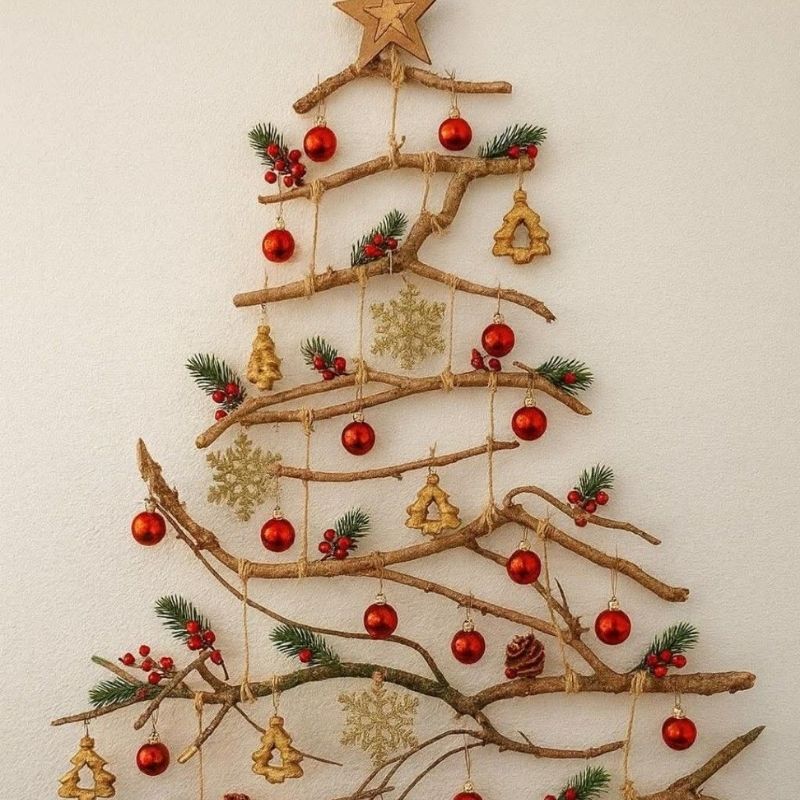
This wall tree uses natural branches arranged in a loose tree shape, then dressed up with red ornaments, small gold accents, and touches of evergreen. It’s rustic, airy, and a beautiful alternative to framed wall décor.
Materials:
- Branches or sticks of different lengths
- Twine
- Red ornaments
- Faux berries
- Evergreen sprigs
- Small hanging ornaments
- Star topper
How It’s Made:
- Lay out the branches from longest to shortest to form a tree silhouette.
- Tie them together vertically with twine.
- Add a top branch or star to define the tree shape.
- Hang ornaments, berries, and small decorative pieces throughout.
- Secure the full piece to the wall with a sturdy hanging loop.
Styling Idea:
This works especially well in apartments, hallways, or minimalist spaces.
9. Pinecone Owl Pair on a Branch
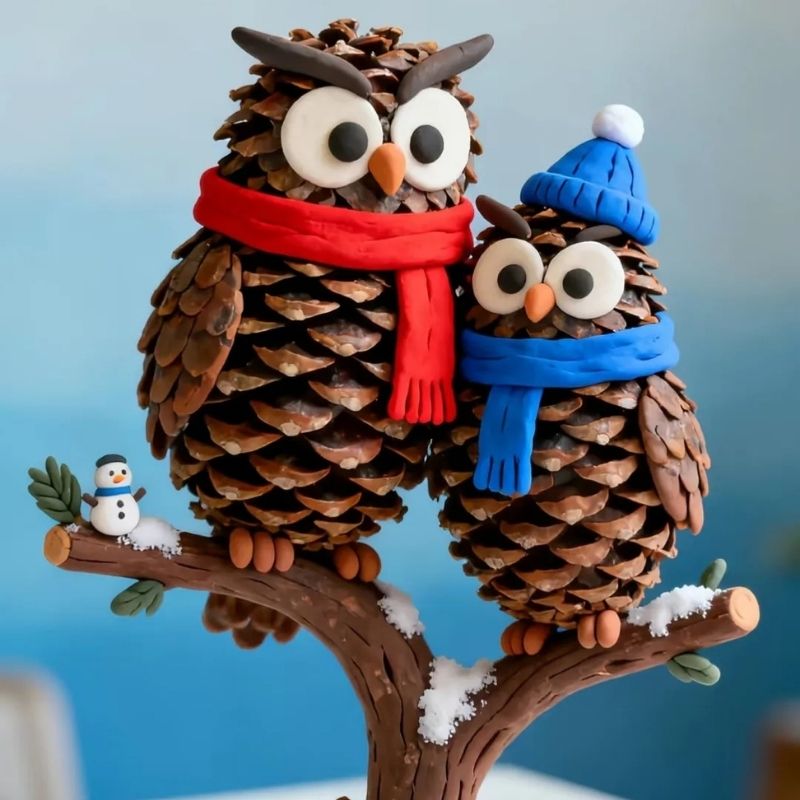
These owls feel a little more sculpted and decorative than the Santa-hat version. Their clay eyes, colorful scarves, winter hats, and perched branch setting give them a storybook charm.
Materials:
- Pinecones
- Air-dry clay or craft foam
- Paint
- Felt or clay for scarves and hats
- Small branch
- Strong glue
- Base stand
How It’s Made:
- Use pinecones as the owl bodies and create large round eyes from clay or foam.
- Add small beaks, feet, and brow details.
- Make miniature scarves and a hat in contrasting colors.
- Glue the owls onto a branch secured to a small base.
- Add tiny snow details for a wintry finish.
Styling Idea:
Display this on a shelf, desk, or child-friendly holiday vignette.
10. Hanging Ornament Branch Display in Plum and Silver
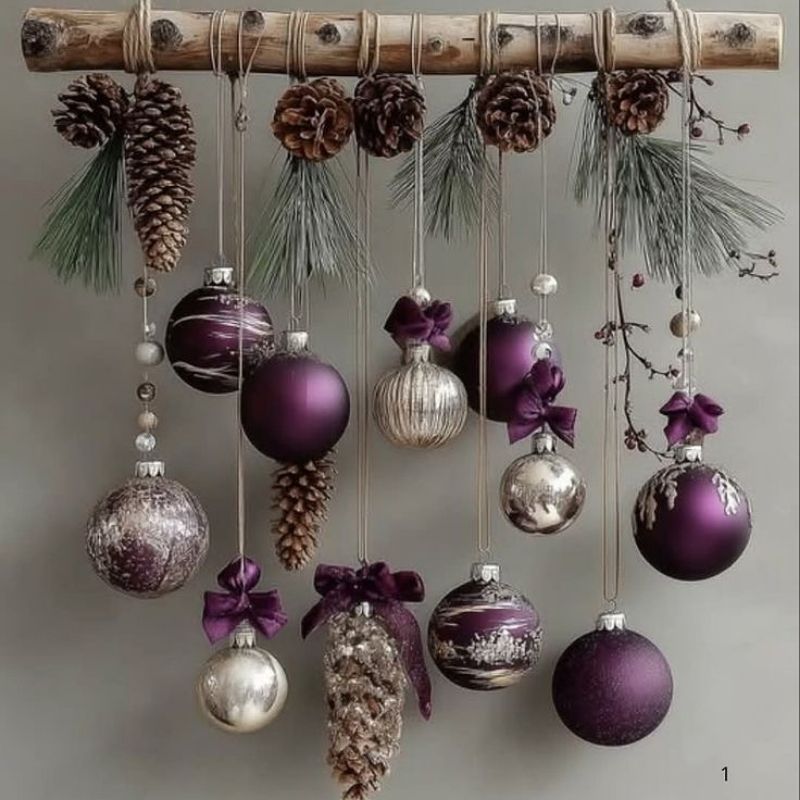
This branch display is one of the more elegant DIY Christmas Décor Crafts, combining plum, silver, and metallic ornaments with bows, pinecones, and greenery for a light, layered arrangement with plenty of movement.
Materials:
- Thick branch or dowel
- Ribbon or cord
- Assorted ornaments
- Pinecones
- Greenery sprigs
- Beads or crystals optional
- Hooks or string
How It’s Made:
- Hang a sturdy branch horizontally from wall hooks or twine.
- Attach ornaments with ribbon or thin string at different lengths.
- Mix in pinecones, greenery, and small decorative accents.
- Add bows to a few ornaments for extra softness.
- Adjust spacing so the full display feels balanced and layered.
Styling Idea:
Use it above a console table or in a dining area for a more elegant look.
11. Acorn Family Winter Scene
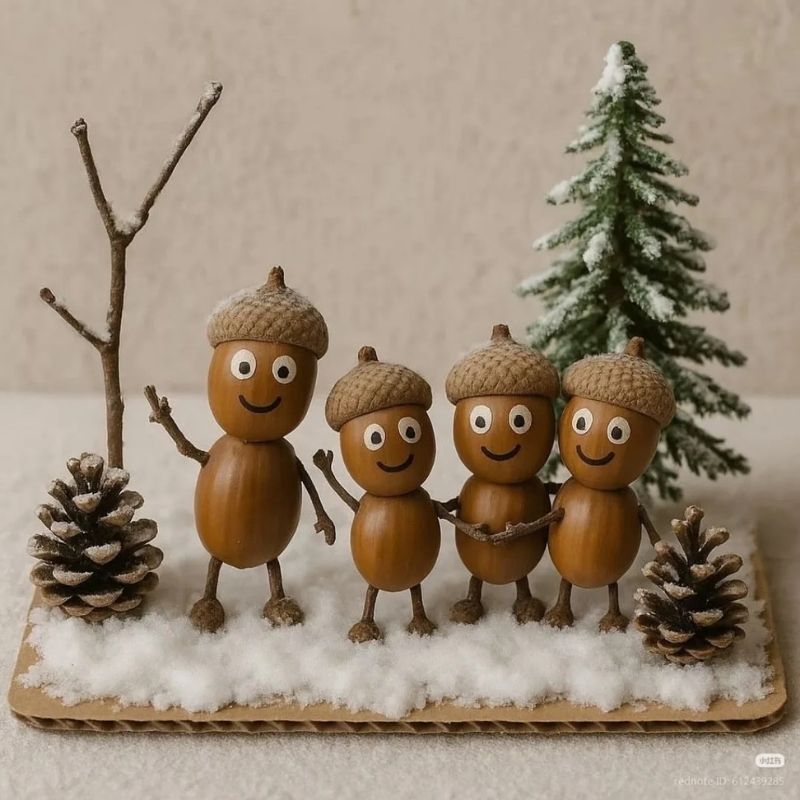
This tiny scene turns acorns into a smiling family standing in the snow with simple twig trees and pinecones nearby. It’s sweet, earthy, and ideal for anyone who loves natural-material Christmas crafts.
Materials:
- Large acorns
- Acorn caps
- Small twig pieces
- Cardboard or wood base
- Cotton batting or faux snow
- Paint or markers
- GlueMini bottlebrush tree optional
How It’s Made:
- Glue acorn caps onto the acorns and stand them upright on the base.
- Paint faces and tiny details like eyes, feet, and arms.
- Add twig arms and arrange the family close together.
- Cover the base with faux snow and add trees or pinecones.
- Let it dry completely before moving the display.
Styling Idea:
This is adorable on a side table, bookshelf, or child’s room shelf.
12. Mason Jar Fairy Light Centerpieces
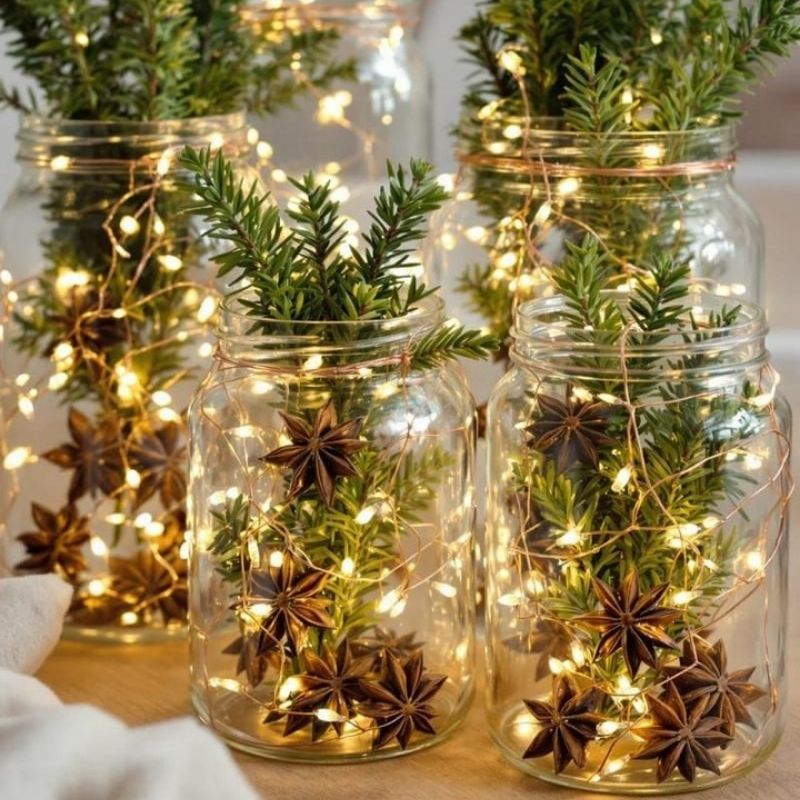
These glowing mason jars are simple but beautiful, filled with warm fairy lights, evergreen sprigs, and star anise. They feel cozy, natural, and slightly fragrant, which makes them lovely for winter tables.
Materials:
- Mason jars
- Battery fairy lights
- Evergreen sprigs
- Star anise
- Optional twine or ribbon
How It’s Made:
- Place a few evergreen sprigs and star anise pieces inside each jar.
- Add a strand of battery-powered fairy lights and spread it out evenly.
- Tuck the battery pack discreetly behind the arrangement if needed.
- Adjust the contents so the lights shine through clearly.
- Group several jars together for the full effect.
Styling Idea:
Use them as centerpieces on a dining table, buffet, or kitchen counter.
13. Handprint Santa Ornaments
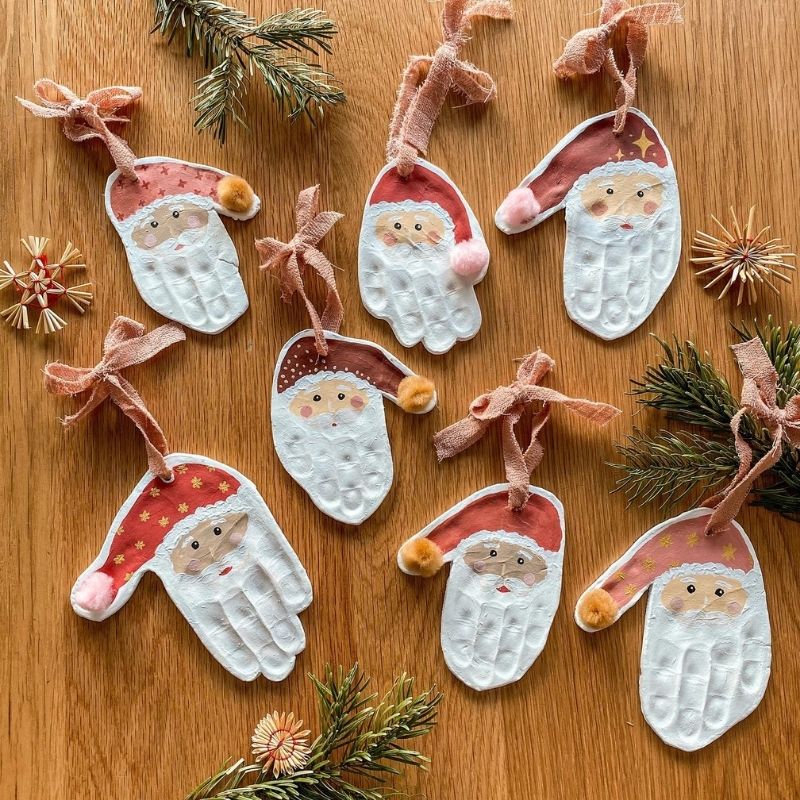
These handprint Santas are some of the sweetest DIY Christmas Décor Crafts, with white beards formed by the handprints, red painted hats, and soft ribbon hangers, making them meaningful keepsakes.
Materials:
- Air-dry clay or salt dough
- White and red paint
- Fine brush or paint pen
- Ribbon, small pom-poms optional
- Hole punch or skewer
How It’s Made:
- Press a child’s hand into clay or dough to create the ornament base.
- Cut around the print and make a hole for hanging before it dries.
- Paint the palm as Santa’s face and the fingers as his beard.
- Add a red hat, facial details, and soft embellishments.
- Thread the ribbon through the top once fully dry.
Styling Idea:
Hang these on the tree or save them as yearly keepsake ornaments.
14. Ginkgo Leaf Christmas Tree Art
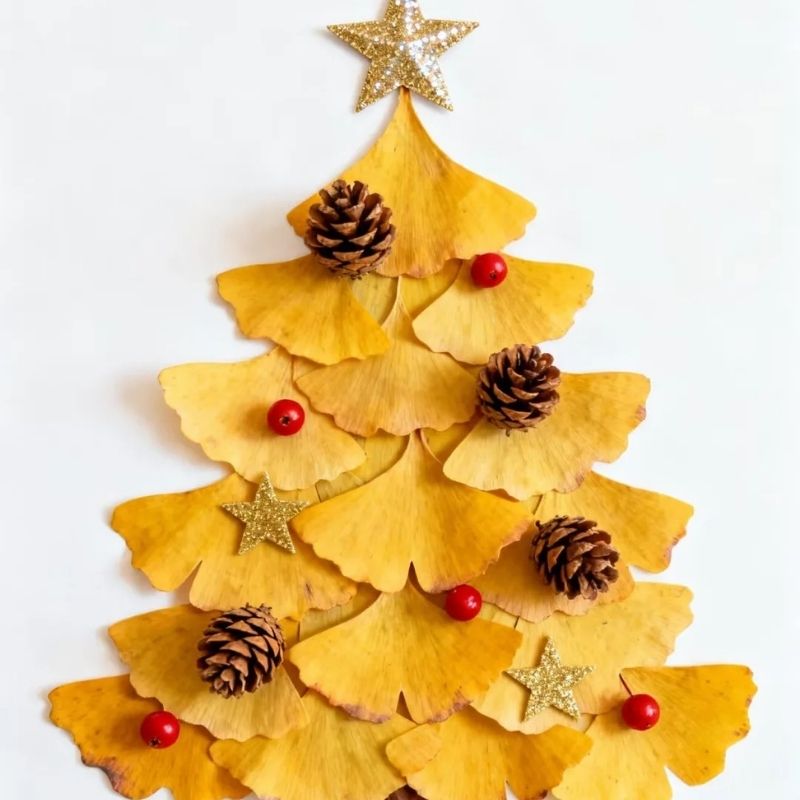
This flat Christmas tree is one of the more elegant DIY Christmas Décor Crafts, featuring layered golden ginkgo leaves, mini pinecones, red berries, and glitter stars arranged into a delicate tree silhouette.
Materials:
- Dried ginkgo leaves
- Cardstock or backing board
- Small pinecones
- Red berries
- Glitter stars
- Glue
How It’s Made:
- Arrange the ginkgo leaves from widest to narrowest in a tree shape.
- Glue them down in overlapping rows on a flat background.
- Add mini pinecones and berries as ornaments.
- Finish with glitter stars placed throughout and at the top.
- Let dry fully before displaying or framing.
Styling Idea:
This looks pretty on a wall, a pinned board, or a holiday gallery shelf.
15. Hanging Greenery and Bauble Wall Display
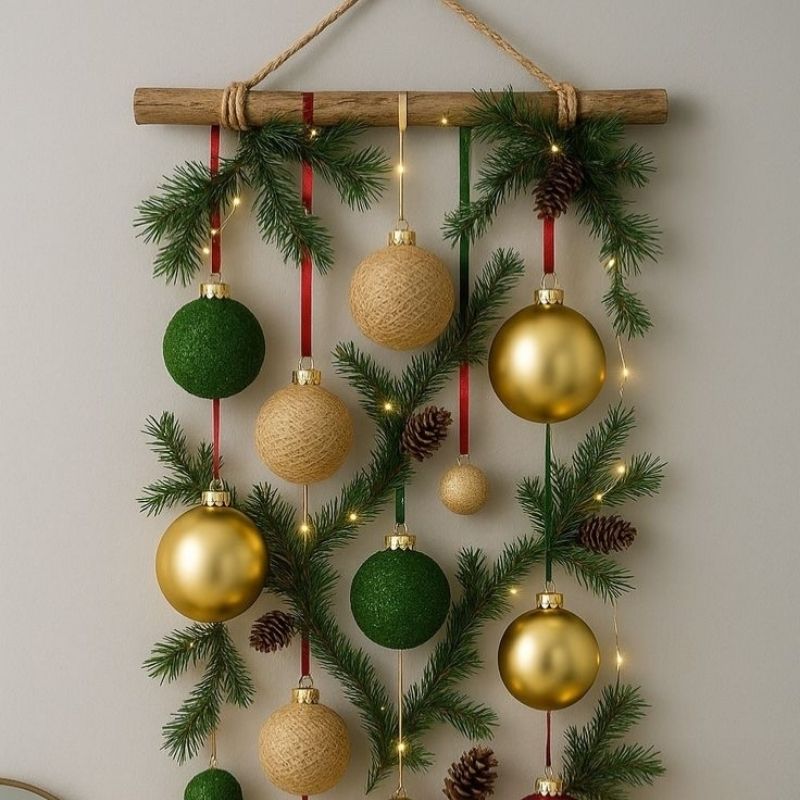
This wall hanging blends rustic wood, evergreen branches, pinecones, string lights, and oversized gold and green baubles. It has a refined, festive look that feels polished without being too formal.
Materials:
- Wooden dowel or branch
- Rope for hanging
- Evergreen sprigs
- Pinecones
- Large ornaments
- Ribbon
- Fairy lights
- Glue or floral wire
How It’s Made:
- Hang the dowel or branch securely with rope.
- Attach greenery in vertical or diagonal lines.
- Suspend ornaments at different heights using ribbon.
- Tuck in pinecones and small strands of lights throughout.
- Step back and rebalance the arrangement if needed.
Styling Idea:
This makes a gorgeous statement over a sideboard or entry console.
16. Button Christmas Trees
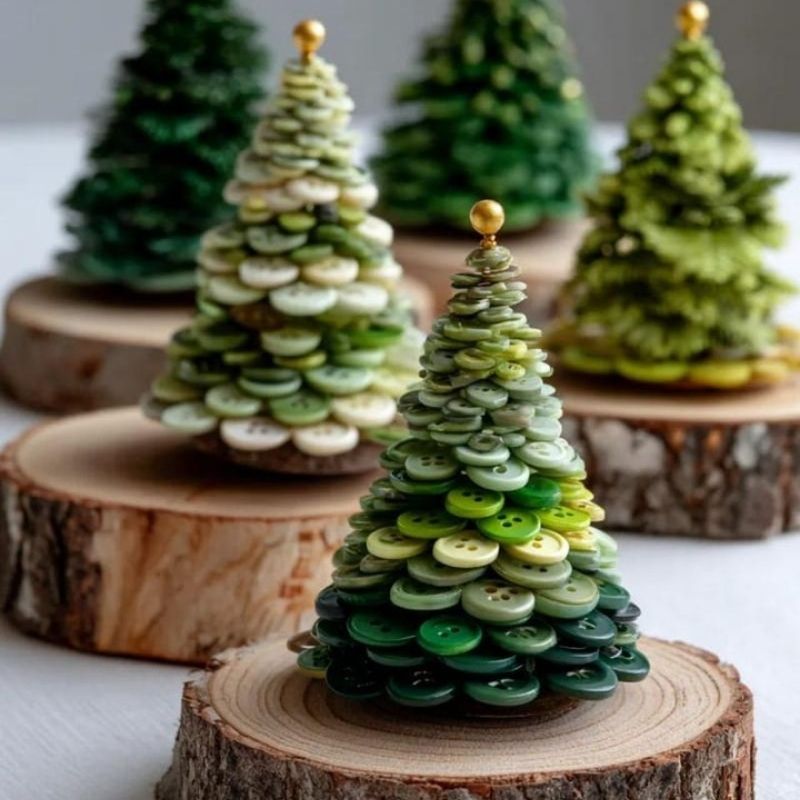
These mini trees are made from layers of green buttons arranged into cone-shaped little evergreens. The color variation gives them depth, while the wood slice bases make them feel grounded and rustic.
Materials:
- Green buttons in assorted sizes
- Foam cones or sturdy cone bases
- Hot glue
- Small beads or pearls for toppers
- Wood slices
How It’s Made:
- Start with a small cone base.
- Glue larger buttons near the bottom and smaller ones toward the top.
- Overlap the buttons slightly to create a full tree shape.
- Add a bead or pearl at the top.
- Glue the finished tree onto a wood slice base.
Styling Idea:
Display them in a cluster on a tray, shelf, or holiday coffee table vignette.
17. Hanging Snowman Wood Slice Wall Décor
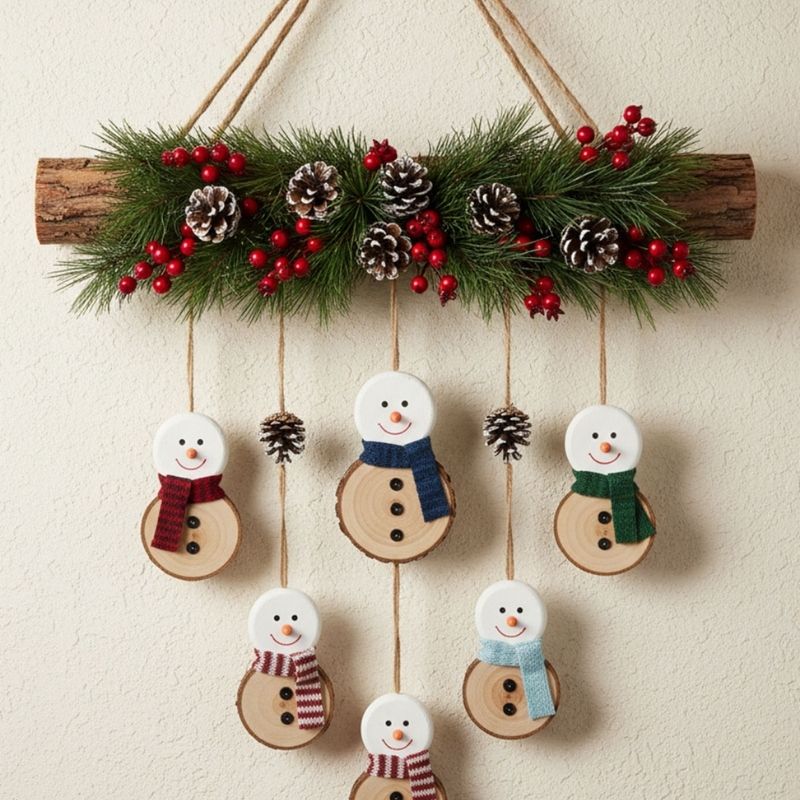
This piece combines a rustic log, evergreen garland, and dangling snowmen made from round wood slices. The scarves add color, while the layered hanging lengths keep the arrangement fun and festive.
Materials:
- Thick branch or log
- Wood slices
- White paint
- Small buttons
- Ribbon or fabric scraps for scarves
- Twine
- Pinecones
- Faux berries and greenery
How It’s Made:
- Decorate the log with greenery, pinecones, and red berry accents.
- Paint wood slice ornaments to create snowman faces and bodies.
- Add buttons, carrot noses, and tiny scarves.
- Suspend the snowmen from the log with twine at different lengths.
- Hang the whole piece securely on the wall.
Styling Idea:
This works beautifully in an entryway or above a small holiday bench.
18. Cinnamon Stick and Wood Slice Tree
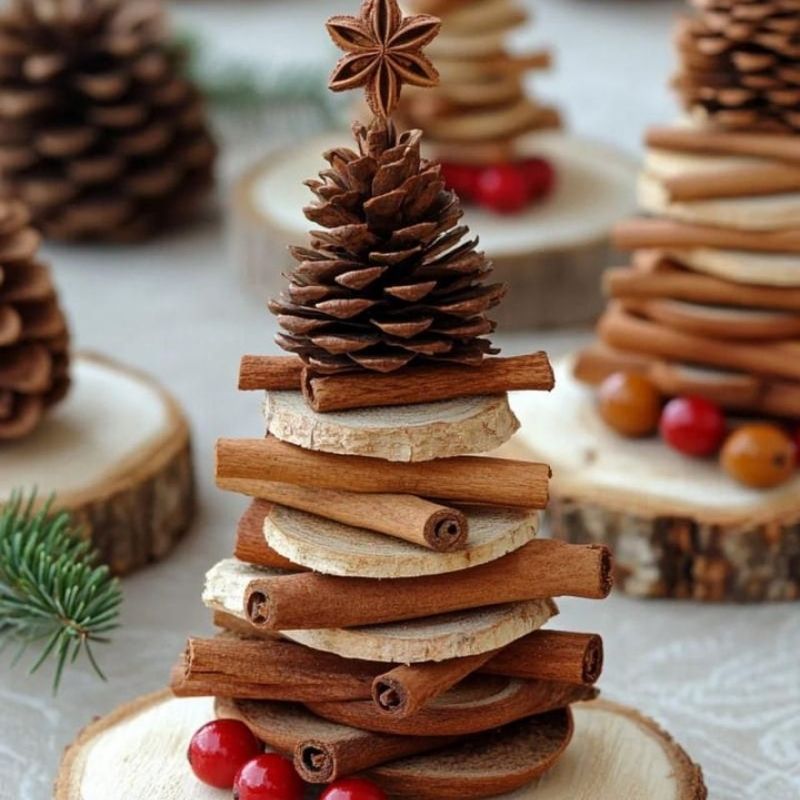
This tabletop tree is one of those DIY Christmas Décor Crafts that feel warm and natural, using stacked wood slices, angled cinnamon sticks, and a pinecone topper finished with star anise.
If you love bringing seasonal scents into your home too, try these Christmas Essential Oil Diffuser Blends.
Materials:
- Small wood slices
- Cinnamon sticks
- Pinecone
- Star anise
- Skewer or strong center support
- Hot glue
- Small berries optional
How It’s Made:
- Build the tree upward by stacking wood slices from largest to smallest.
- Tuck cinnamon sticks diagonally between the layers for texture.
- Secure the full stack with a center skewer or strong glue.
- Add a pinecone to the top and finish with star anise.
- Place a few berries around the base if you want extra color.
Styling Idea:
Set it on a kitchen counter, tray, or winter centerpiece.
19. Floating Candle Mason Jars
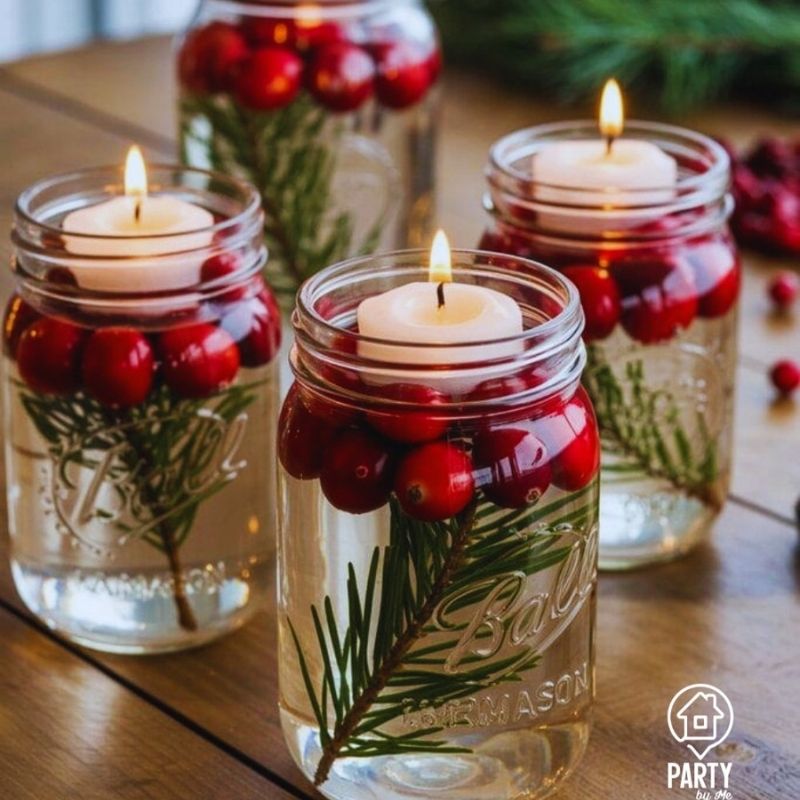
These simple mason jar centerpieces look elegant and fresh, with clear water, cranberries, evergreen sprigs, and floating white candles. The red-and-green color palette keeps them classic and easy to style.
Materials:
- Mason jars
- Water
- Fresh cranberries
- Evergreen clippings
- Floating candles
How It’s Made:
- Fill each jar with water, leaving enough room at the top for the candle.
- Add a small sprig of evergreen and a handful of cranberries.
- Place a floating candle gently on the surface.
- Light only when the jars are placed on a steady, safe surface.
- Refill water as needed if using it for a gathering.
Styling Idea:
These make lovely dining-table centerpieces or holiday-buffet accents.
20. Outdoor Pallet Wood Christmas Trees
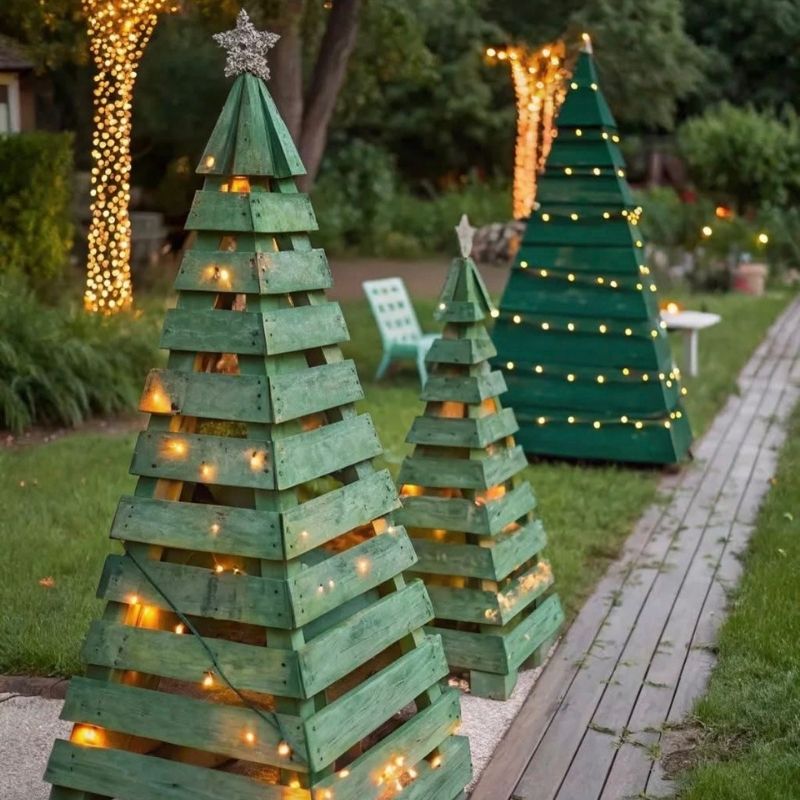
These oversized outdoor trees are some of the most eye-catching DIY Christmas Décor Crafts, turning painted wooden slats, green paint, and warm lights into glowing yard décor.
Materials:
- Reclaimed wood slats or pallet boards
- Screws or nails
- Green outdoor paint
- Outdoor string lights
- Star topper
- Basic tools
How It’s Made:
- Cut or arrange slats in graduated sizes to form a tree shape.
- Build a sturdy triangular frame and attach the slats across it.
- Paint the structure green and let it dry thoroughly.
- Wrap or weave outdoor lights through the openings.
- Add a star topper and place the trees securely in the yard.
Styling Idea:
These are ideal beside a walkway, porch, or garden path.
21. Light-Up Holiday Bottles

These glowing bottles combine fairy lights, burlap, cinnamon sticks, berries, and evergreen sprigs for a rustic Christmas look. They feel warm, homey, and slightly farmhouse-inspired without being too heavy.
Materials:
- Clear glass bottles
- Battery fairy lights
- Burlap or linen fabric
- Twine
- Faux berries
- Cinnamon sticks
- Evergreen sprigs
- Pinecones optional
How It’s Made:
- Place a strand of fairy lights inside each bottle.
- Tie burlap around the neck and secure it with twine.
- Insert cinnamon sticks and evergreen sprigs into the top opening.
- Add berry sprigs around or inside the bottle for color.
- Arrange the bottles together on a tray for a fuller display.
Styling Idea:
They look beautiful on a dining table, mantel, or kitchen island.
22. Wooden Christmas Tree with Ornament Cutouts
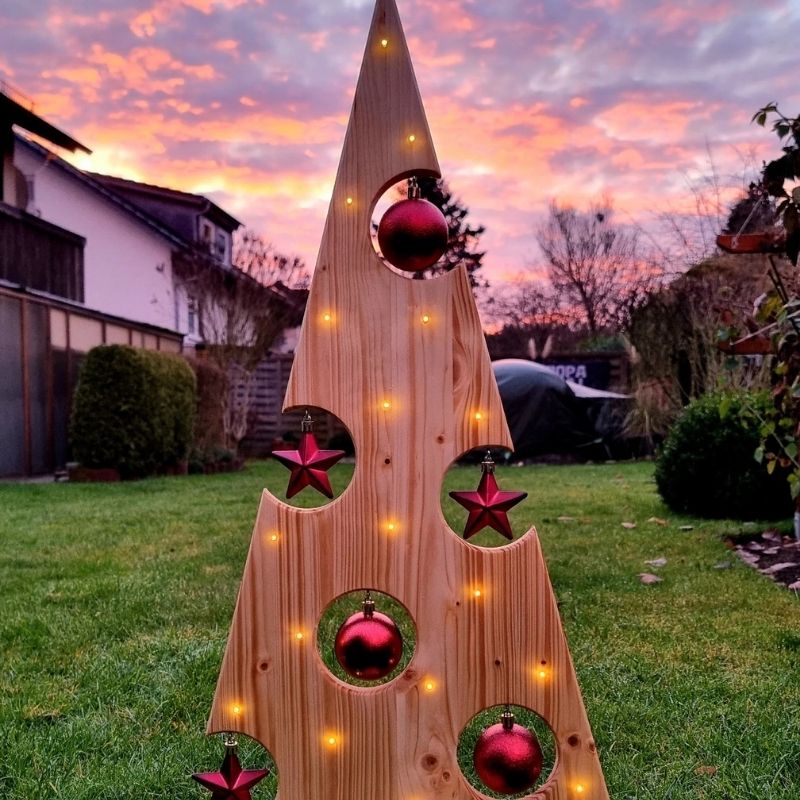
This sculptural wooden tree has a clean, modern silhouette, circular cutouts, and red ornaments hanging within the openings. The tiny warm lights keep it festive while still feeling sleek and minimal.
Materials:
- Wooden board
- Jigsaw or pre-cut wooden shape
- Sandpaper
- Red ornaments
- Warm mini lights
- Hooks or wire for hanging ornaments
- Base support
How It’s Made:
- Cut a Christmas tree shape from a wooden board.
- Create round openings in different areas of the tree.
- Sand the edges smooth and keep the natural wood finish or stain lightly.
- Hang red ornaments inside the cutouts.
- Add small warm lights across the surface for a subtle glow.
Styling Idea:
Use it as a porch accent, patio decoration, or indoor statement piece.
23. Cork and Lace Angel Ornaments
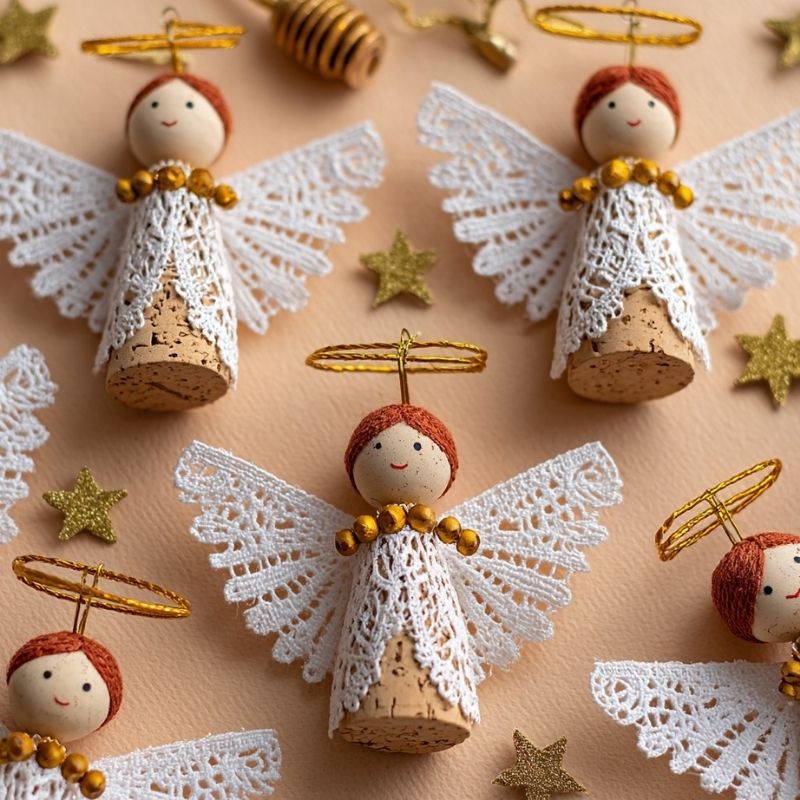
These tiny angels are delicate and sweet, made from cork bodies, lace wings, soft painted faces, and gold halo details. They have a handmade vintage charm that feels gentle and timeless.
Materials:
- Wine corks
- Wooden beads or clay balls for heads
- Lace trim
- Gold wire
- Small beads
- Paint or fine pens
- Glue
How It’s Made:
- Glue a wooden bead or shaped head onto each cork.
- Cut lace into wing- and dress-like shapes, then attach them around the body.
- Add tiny bead details around the neck if desired.
- Form small halos from gold wire and glue them behind the head.
- Draw simple facial features and attach a loop for hanging.
Styling Idea:
Hang them on the tree or tuck them into garlands and gift wrapping.
24. Bird Nest Christmas Tree Centerpiece
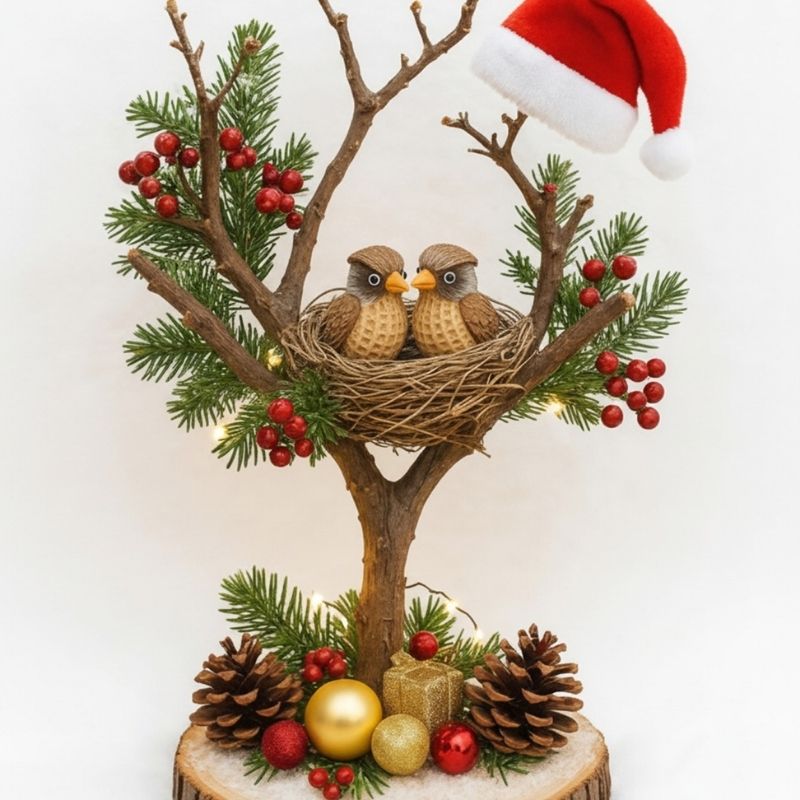
This creative centerpiece uses branches to form a small tree-like stand, topped with a bird’s nest and tiny birds, then decorated below with pinecones, berries, ornaments, and a playful Santa hat.
Materials:
- Branches
- Wood slice or sturdy base
- Craft nest
- Small bird figurines
- Pinecones
- Faux berries
- Mini ornaments
- Evergreen sprigs
- Tiny Santa hat
- Glue
How It’s Made:
- Build and secure a branch structure onto a wood slice base.
- Attach the nest at the top center and place the birds inside.
- Decorate the base with ornaments, pinecones, and greenery.
- Tuck in faux berries and small Christmas accents.
- Add the Santa hat near the top for a festive finishing touch.
Styling Idea:
This is a wonderful centerpiece for a side table or entry display.
25. Wooden Arch Snowman Displays
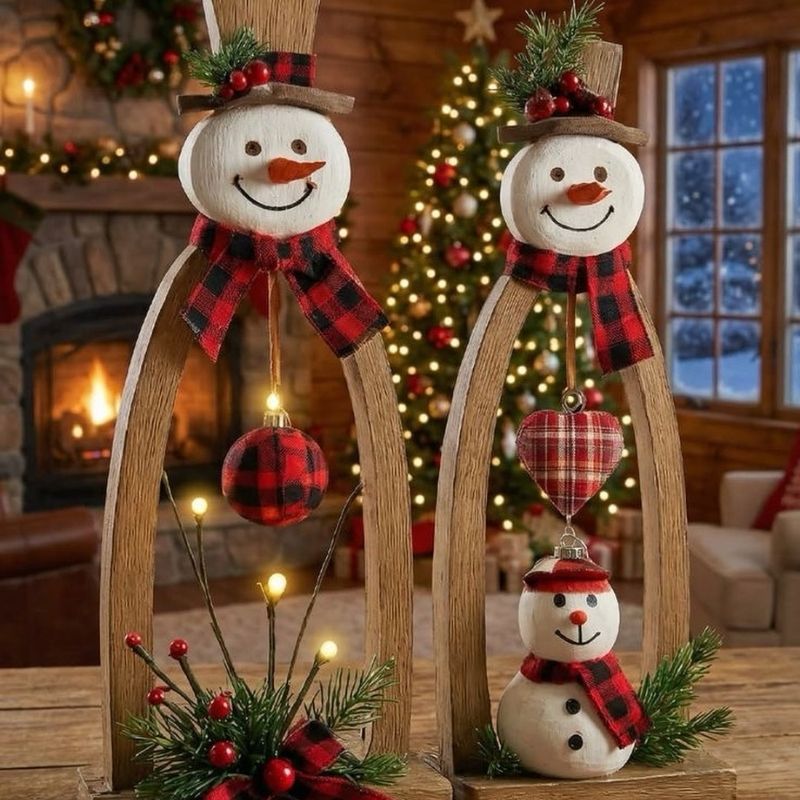
These tall, arched displays feature smiling snowman heads at the top, buffalo-plaid scarves, and hanging ornaments below. The mix of wood, greenery, warm lights, and red details makes them feel cozy and cabin-inspired.
Materials:
- Curved wooden slats or pre-made wooden arches
- Wooden balls or round cutouts for snowman faces
- Paint
- Plaid ribbon or fabric
- Small ornaments
- Greenery
- Mini string lights
- Small wood embellishments
- Glue
How It’s Made:
- Build or assemble the wooden arch shape and secure it to a base.
- Add a round snowman face at the top and paint the features.
- Attach a small hat and plaid scarf for character.
- Hang a small ornament or mini snowman inside the arch.
- Finish with greenery and tiny lights around the base area.
Styling Idea:
These are lovely next to a fireplace, on a console, or as entryway décor.
Final Thoughts on These DIY Christmas Décor Crafts
These DIY Christmas Décor Crafts show just how many ways you can bring personality into your holiday decorating, from rustic pinecones and greenery to playful snowmen and glowing centerpieces.
You certainly don’t need to make them all; sometimes one handmade piece is enough to make your Christmas décor feel more personal.
Which design would you love to try this holiday season?

Hi I’m Ana. I’m all about trying to live the best life you can. This blog is all about working to become physically healthy, mentally healthy and financially free! There lots of DIY tips, personal finance tips and just general tips on how to live the best life.
Leave a Reply